Wednesday, October 7, 2015

Lake Tahoe's Natural History

Lake Tahoe (Wikipedia)
Lake Tahoe is a popular destination for travelers all over the world.  When you visit Lake Tahoe, use this helpful reference to teach your little explorers about the natural history of the area.

Lake Tahoe is only 2 million years old, so what did the area look like before that?  The valley that would become the Tahoe Basin sank into the Earth's crust, but the mountains around the area continued to rise.  Then volcanos erupted and blocked the water's outlet, causing water to fill in with water.  

At 1,645 feet deep, Lake Tahoe is the 2nd deepest lake in the United States (Crater Lake in Oregon being the first).  The Lake currently holds approximately 39 TRILLION gallons of water, and if it were emptied, it would cover the entire surface of the state of California in 15 inches of water.

Lake Tahoe from Space (Wikipedia)

A lot of people wonder why Tahoe is so blue and so clear compared to other lakes.  The surrounding mountains are comprised of mostly granite with hardly any topsoil.  When it rains, there isn't a lot of organic matter on the granite so the watershed doesn't bring nutrients to the lake over the course of it's runoff.  This means that algae and other organisms that normally make water murky don't have any food to survive.  As a result, the water is some of the clearest in the world.  When UC Davis first started taking measurements of the water clarity in 1968, it was clear to 102.4 feet deep.  It currently stands at 77.8 feet.

You can learn more about how the water clarity is measured and tracked at the Tahoe Science Center at Sierra Nevada College in Incline Village.  There are hands-on exhibits aimed at kids of elementary school age, but on our recent visit, our whole family (age range 2-70) had a great time.  If you visit, I highly recommend a stroll around the campus. There's a nature trail meandering through a grove of Jeffrey Pines that is inspiring, peaceful, and smells amazing (hug one of the trees and take a whiff of the bark and you'll see what I mean).  

Tahoe Science Center at Sierra Nevada College (UC Davis)

With an average annual snowfall of 409 inches, it's no surprise that the snow melting into Lake Tahoe leaves the water pretty chilly!  The average water temperature is 42.1F (brr!) but the average at the surface is a brisk 51.9F.

One of my favorite facts about Lake Tahoe isn't so much about the natural history of the area, but an important part of it's history nevertheless.  In 1928, Ms. Lora Josephine Knight had a stone building built and transported by boat to Fannette Island in the middle of Emerald Bay.  The only island in Lake Tahoe, Fannette Island juts 150 feet into the sky above the surface of the lake.  Ms. Knight would entertain friends and serve tea in the building, earning it the name of the "Tea House."  Not much of the building remains today, but you can travel to the island by boat, canoe, or kayak and climb up the rocks to the Tea House.

Fannette Island and the Tea House (Wikipedia)
Sources:
Tahoe Environmental Research Center - UC Davis, U.S. Geological Survey, U.S. Forest Service, Wikipedia

Thursday, July 2, 2015

Destination: San Simeon

San Simeon, located in California's Central Coast, is a fantastic family getaway with so many opportunities for natural education.  Located just north of Cambria and San Luis Obispo, the area is a great choice whether you are looking for a camping trip or a laid-back tourist experience.

Lodging:
Hearst San Simeon State Park offers two different camping areas.  The San Simeon Creek Campground has established sites for tent and RV camping.  Each campsite features a picnic table and a fire ring.  There are spigots for water around the campground.  Flush toilets are available, and showers are also available (coin-operated).    One mile inland, you'll find the Washburn Primitive Campground.  Sites here still have a picnic table and fire ring, but the toilets are chemical-flush.

There are also plenty of non-camping options in the area as well, since it is a busy tourist destination.  Cambria, just a few miles south on Highway 1, has plenty of beach-side hotels.  In San Simeon, we recommend The Morgan Hotel, which pays tribute the Julia Morgan, the architect of the famous Hearst Castle.  You can also check Airbnb listings, condos run $100-$200 per night in the area.

Activities:

The Elephant Seal Rookery at Piedras Blancas

Elephant Seal Rookery - Just four miles north of Hearst Castle, you can visit the home of more than 17,000 elephant seals.  The Rookery is open year-round and there is no cost for admission.  The trails along the rookery are all wheelchair and stroller accessible.  While elephant seals visit the rookery year round, the Friends of the Elephant Seal website has a calendar that shows their annual patterns.

Zebras roam the area around San Simeon, they are descendants from Hearst's private zoo.
Hearst Castle - The main tourist attraction in the area, the Hearst Castle attracts millions of visitors per year to tour the grand estate built between 1919-1947 for newspaper magnate William Randolph Hearst.  While Mr. Hearst was still alive, he had a private zoo on the grounds.  There were deer, camels, antelopes, and many other exotic animals living on the ranch at different periods of time.  Faced with financial difficulties, Mr. Hearts was forced to disperse many of the animals living on the ranch, however by the time of his death, many animals remained on the property and were allowed to roam free.  Herds of zebras can be found wandering around the property and the area of San Simeon.  The picture above was taken from the balcony of a condo we rented on our last visit there.

Piedras Blancas Lighthouse - Tours are offered year round at this lighthouse, built in 1875.  Check their website for tour schedules.  The tour is approximately 2 hours, with 1/2 mile of easy walking.  There is no charge for kids under 5.

Coastal Discovery Museum - Park of the Monterey Bay National Marine Sanctuary, the Center offers interactive exhibits and education programs which highlight the cultural and natural history of San Simeon, California State Parks and Monterey Bay National Marine Sanctuary. The interface of land and sea is unique here, drawing people for its rich bounty, economic opportunity, recreation and inspiration. Protecting these special places preserves them for use and enjoyment for generations to come.  Admission is free, although hours are limited, so check the schedule before you visit

Mr. H and Lil' H enjoying a beautiful sunset at San Simeon State Park
Beach Access - There are plenty of spots to  pull over along Highway 1 and enjoy the view of the Pacific Ocean.  There is a parking area directly across from San Simeon State Park that offers gorgeous views at Sunset.  If you are staying in San Simeon, you can take a short walk down Vista Del Mar Avenue. At the end of the road, it turns into a dirt path where you can walk along the cliffs or venture out towards the waves.  Pay close attention to the changing tidal patterns - we were walking far from the water line (we thought!) when the tide rushed in and soaked our shoes and pants!

Walking along the cliffs, off the Vista Del Mar path
If you venture south from San Simeon to the San Luis Obispo area, make time to visit the San Luis Obispo Children's Museum.  This was my favorite place to visit when I was a kid

If you are visiting San Simeon from the Bay Area, I recommend taking 101 South to get there, but driving home through Big Sur.  The elegant winding ribbon of road from San Simeon to Carmel is one of the most beautiful drives in the United States.  There are also many State Parks along the way if you need to stop and stretch your legs:

  • Limekiln State Park
  • Pfieffer Big Sur State Park
  • Andrew Molera State Park
Unfortunately dogs are not allowed on trails in most California State Parks, so if you are traveling with a dog, check out Pine Ridge Trailhead at Big Sur Station instead.  


Wednesday, May 6, 2015

Selecting A Trail: Reading Trail Maps

Did you know that you can actually determine how steep a trail is BEFORE you head out from the trail head, and find out the hard way that it's way too steep for your little hiker?

Allow me to introduce the idea of the topographic map.  You've probably noticed the slender, squiggly lines on your trail maps.  "Topos," as they are called, use detail lines to show the elevation change of any given area.

Last weekend, Lil' H and I enjoyed a nice hike in Sanborn County Park.  We wanted to check out Lake Ranch Reservoir, and a quick check of the Park Map showed two trails to access the Reservoir.


Two trails to Lake Ranch Reservoir
The trail in the northwest corner, leaving from Sanborn Rd, is the short and direct Lake Ranch Trail, listed at .6 miles.  Starting in the southeast corner of the map, with the trailhead off of Black Road, is the John Nicholas Trail, listed at 1.4 miles.  The shorter trail seems like the better option, right?  But let's look at what the topo lines show us.

Each bold line represents a major elevation delineation.  All maps are different, so you want to read the legend on a new map, but on this map, each bold line represents 200 feet in elevation change.  In between each bold line are four slender lines.  These represent 40 feet in elevation change.   The closer together the lines are, the steeper the terrain.  Let's use this information and apply it to our map.

The Lake Ranch Trail to the Reservoir

We'll start with our shorter trail - the Lake Ranch trail to the Reservoir. I have marked the bold topo lines in green.  The trail (in yellow) starts three slender lines below the 1600' bold line.  This means the trail starts at approximately 1480'.  Remember, each slender line represents 40' feet. The end of the trail, at the reservoir, ends right at the 1800' bold line.  This means an elevation gain of 320 feet over .6 miles, an incline of 10%.  Another way to think about it is for every 100 feet you walk forward, you gain 10 feet in elevation, or one flight of stairs.  If this is starting to sound a lot like algebra, you are correct.  You calculate incline by dividing "rise over run," sound familiar?

The John Nicholas Trail to Lake Ranch Reservoir
Now, let's see how that compares to our longer trail, the John Nicholas Trail.  The trail starts two slender lines above the 1800' bold line, at approximately 1880 feet.  The trail stays mostly between the lines.  In map lingo, this is known as hugging the contour.  Right where the map says "1.4", the trail actually dips below the bold line, meaning that you lose some elevation, so we've actually gone downhill by about 120' .  The trail ends right at the 1800' bold line, so we do have to regain that altitude.  The trail will have gentle ups and downs, but overall, your elevation gain, and the incline, will be negligible.

So, in this case, a 1.4 mile gently rolling trail may be longer, but is going to be easier on young hikers or parents carrying kids in Keltys than a steep .6 mile climb. Hopefully you can use this information to help you evaluate trails for your future hiking plans. Knowing how to read the topos can help you determine whether a trail is appropriate for your family.  Which trail did we choose, you might wonder?  We actually opted for the short and steep Lake Ranch Trail because I'm training for Mt. Whitney and need as much uphill climbing as I can get!

Mrs. H and Lil' H setting off for Lake Ranch Reservoir as part of the Parks For Life Challenge
If you are interested in viewing more topo maps, the USGS website allows you to search for and download maps for the entire country.  You can also purchase paper versions on durable, water-resistant paper.  Download and print the Half Dome map (just click on the preview image for a free high-res download) and practice tracing the trail and calculating the elevation for a fun activity with your kids.

Sunday, April 19, 2015

Destination: Pinnacles National Park

There are several days each year that all National Parks are free to enter. We took advantage of a free entrance day recently and checked out Pinnacles National Park.  Opened as a National Park in 2013, Pinnacles features miles of hiking trails, talus caves, and a campground.  It's a short drive from California's Bay Area and the 30 miles of trails offer lots of family friendly hiking opportunities.

Our first view of the Balconies Cliffs from the trail
My overall impression:
Positive:  Lots of easy/flat trails for family hiking, cave exploration, great Bay Area day trip option
Negative:  Sunny/exposed campground, would be too hot to visit in summer

On the trail between Balconies Cave and Old Pinnacles
There are two entrances to Pinnacles National Park, and it is important to note that there are no thru roads that cross the park.  Check out the map ahead of time, or read the hiking trail suggestions, and that will help you determine which entrance to use.  There is no water available in the park, so make sure to bring enough water for all members of your hiking party.  Leashed dogs are allowed in the park in picnic areas and campgrounds, but they are not allowed on any trails.  Please do not leave them in cars while you hike, if you are going to hike on the trails, leave Fido at home.

Lil' H is a Daddy's Girl
We were especially intrigued by the talus caves that you can explore, so we checked the cave status page and discovered that the Bear Gulch caves were momentarily closed for bat roosting season. That narrowed our choice down to the Balconies Cave.

Depending on how many miles you want to hike, there are several ways to access the Balconies Cave.  The shortest route is from the West Entrance, hiking 2.4 miles round trip from the Chaparral Trailhead to the cave and back.  We wanted to hike further, so we actually started from the East Entrance at the Old Pinnacles trailhead.  The loop from the trailhead, over the Balconies Cliffs trail, and down through the Balconies Caves was 6.15 miles and took us 2 hours, 45 minutes, plus a lunch break on the highpoint of the Balconies Cliffs trail.  You can make this shorter by bypassing the Balconies Cliffs part of the trail, then it would be 5.3 flat miles roundtrip.


The trail out of Old Pinnacles was wide and flat and followed the West Fork Cholone Creek.  The trail alternates between sunny and shady sections, and would be even prettier if there were any water in the creek (darn drought!).  We still saw lots of wildflowers and some wildlife, including lizards, butterflies, and woodpeckers.  It is 2 easy miles from the trailhead to the Balconies Cliffs trail junction, where you can choose to go directly to the cave (you would be climbing up through the caves in this direction), or you can take a detour on the Balconies Cliffs trail.  This section of the trail is steep but the view is worth it. Lil' H especially liked watching the rock climbers who were roped up on the cliffs. If you take the Balconies Cliffs trail, you loop around to the far side of the cave, and you climb down through the cave.

Starting to wonder if this trail was a good idea, a tight fit!
About the cave itself - if you plan to hike through the caves, make sure you have sturdy footwear and a flashlight.  Do not plan to carry or wear a child for this section of the trail.  Lil' H was in a Kelty kid carrier for the first part of the hike, but it became clear after the 2nd or 3rd boulder that she was going to have to walk herself through the caves.  It quickly turns into a hands-and-feet rock scramble.  I was glad we had headlamps as carrying a flashlight in my hand would have made it harder to balance and help Lil' H at the same time.  Lil' H is an experienced and adventurous kid at 2.5 years old, but I'd say 4 and up is a better age for this trail.  If you take younger children, be prepared to assist them as you move up and down the large boulders.  This is not a good hike for kids (or adults!) who are claustrophobic or afraid of the dark.

Mr. H ducks under a rock as we enter the cave, Lil' H had to walk on her own from here.
Lil' H dons a headlamp as we enter the cave. 
Mr. H helps Lil' H into the Balconies Cave
Deep in the cave, there is a spring-fed waterfall running down the rocks.
There is a light at the end of the tunnel, I mean, cave!
As we were leaving Pinnacles, we stopped at the Visitor Center to buy a snack.  The store is well-stocked and the prices are surprisingly affordable.  They have a large selection of Junior Ranger products that were so cute for a budding naturalist (good thing Lil' H was in the car with Mr. H or I'm sure I would have had to buy one of everything!).  Directly behind the Visitor Center, there is a pool so if you plan to camp, bring a bathing suit!

There is a campground at the East Entrance of Pinnacles.  There is no camping available on the West side.  We were disappointed before our visit that the campground was already sold out, but honestly, after driving through the park, the campground did not look appealing to me.  Each campsite had a fire ring (check the current fire danger status, fires were not allowed during our visit due to the drought) and a picnic table, but there was no shade to be found anywhere. We are lucky that Pinnacles is close enough to make a day trip out of it, and I think we'll keep it that way instead of camping.

I definitely plan to visit again.  We had so much fun climbing through the Balconies Cave that we are already looking forward to visiting the Bear Gulch Cave when it reopens.  Spring and Fall are the best times to visit Pinnacles, as the lower elevations in the park would be very hot and exposed in the summer months.

Wednesday, April 8, 2015

Destination: Villa Montalvo County Park and Montalvo Arts Center

"Nature's peace will flow into you as sunshine flows into trees" -- John Muir

I stumbled across this quote on a bench as Lil' H and I explored Villa Montalvo County Park and Montalvo Arts Center and found it right on point.  Our day had been rough so far - my patience had worn thin and she was acting like, well, like a two-year old.  But as soon as we stepped foot in the grounds of Villa Montalvo and took a deep breath of fresh, piney, mountain air, we were renewed!

The Historic Villa as viewed from the Italianate Garden
While Villa Montalvo was once the home of former United States Senator James D. Phelan, you may be more familiar with Villa Montalvo and the Montalvo Arts Center as a prime wedding destination.  In addition to art exhibits, theatre performances, and other events, it also has 175 acres of green space and hiking trails to be explored.  With sculptures, ponds, gardens, and more there is something for everyone here!

A new piece of art to admire around every twist and turn in the trail
There is no fee to enter the park and no fee for parking.  The park is open seven days a week, but occasionally closed for special events.  It was our first time at Montalvo, and we wanted to see everything! We started at Parking Lot #2 (you can download a map on the Montalvo Arts website).  From there, we meandered across the Great Lawn and headed towards the Mermaid Pond.  Lil' H was disappointed that we didn't find Ariel, but she did enjoy learning a new word: "statue."

An installation of birdhouses near the Mermaid Pond
Next, we toured the Italianate Garden which is filled with lovely marble statues, the Phelan Cactus Garden, and the Love Temple.

The Love Temple in the Italianate Garden
After our tour of the Italianate Gardens, we set off in search of hiking trails.  You can pick up the trails from Parking Lot 3 or 4.  Lot 4 is nice because it has restrooms.  Lot 3 connects with the trail a little higher up so you can skip the initial steep part of the hike.  Where the trail connects at Lot 3, you'll also find the beautiful Belvedere Temple, an art installation that captures the beautiful light in the area.

The Belvedere Temple
Inside the Belvedere Temple
One of the great things about Villa Montalvo is that all of the trails connect and intersect together in frequent, short intervals.  This means that you can easily make your hike shorter or longer depending on how your kiddos are doing.  I let Lil' H lead the way; whenever we came to a trail junction, I just asked if she wanted to go right or left.  We ended up doing about a half-mile on the Lookout and Nature Trails before we headed down to the Garden Theatre and Poet's Walk.

Lil' H is searching for interesting leaves and sticks on the Nature Trail
The paths near the Villa are mostly paved and accessible.  The trails in the County Park are dirt, but groomed enough that a jogging stroller could handle them (though be warned of steep stairs on the Poet's Walk).    You can download a more detailed trail map from the Santa Clara County Parks website


Stairs on the Poet Walk are fun for kids, but not stroller friendly
Overall, I would highly recommend Villa Montalvo for it's low commitment in terms of driving time, hiking distances, and lots of interesting artwork to hold your little hiker's attention.  We had a wonderful visit, and I can't wait to take Mr. H next time to the top of Lookout Point.

"Mama, am I in the circus?"
Note: Dogs are allowed on the upper trails in the park, but not by the Villa or gardens.  If you do bring your dog(s), please make sure to keep them leashed at all times to protect them from poison oak and mountain lions. 

Sunday, March 22, 2015

Destination: Don Edwards National Wildlife Refuge

There is a natural treasure tucked into the landscape of Silicon Valley.  In the shadow of Levi's Stadium and the NASA Ames hangers, lies the country's first urban national wildlife refuge.  The Don Edwards National Wildlife Refuge is a great stop for families interested in the flora and fauna of the San Francisco Bay.

Photo Credit: Jeffrey Yung

There are two ways to access the NWR.  If you are coming up from the South Bay, you can start at the Environmental Education Center, in Alviso.  From the East Bay, you can start from the Visitor Center in Fremont.  The two areas of the refuge do not currently connect via any trail, but from new trail construction, it looks like that is the future plan.

The extensive trail network was what drew us to the refuge on a beautiful spring morning.  We started our visit from the Alviso side, at the Environmental Education Center.  We were traveling by bike, with kid trailers in tow, so we were quite surprised to find that all of the bike-accessible trails are actually dirt.  However, they were wide and flat so we fared well.  If you plan to travel around the refuge by bicycle, I recommend a mountain or trail bike, a true road bike might not fare too well.  It is also important to check the weather - the trails are impassable in wet conditions.  We did a long loop around the Mallard Slough Trail and the Alviso Slough Trail.  Here were our highlights:

  • Views of Levi's Stadium and NASA Ames hangers
  • Wildlife sightings including Canada geese, mallard ducks, and black-necked stilts
  • Wildflowers in bloom along the levees 

Our kid-passengers were also very excited to see the Amtrak train roll by us on the trail - TWICE!  Lil' H told me to "catch the train" so she could wave at the "captain."
Photo Credit: Ambarish Goswami
On our next visit, I plan to explore on foot/stroller.  I would start at the parking lot just outside the Refuge gate, and walk up the Marsh View Trail to the Environmental Education Center.  From there, you can wander through the Butterfly Garden, or visit the Center.  The Center is open seven days a week, excluding federal holidays.  Then take the New Chicago Marsh Trail for a kid-friendly half-mile walk.  The Trail is mostly wooden boardwalks over the marsh and there is plenty of educational signage to help identify the flora and fauna.

We plan to do a visit to the Fremont side in the near future as well.  In fact, I look forward to many visits in the future!

Please note that pets are not allowed in any part of the refuge.  Even though it is nice to walk with our animals, they scare off the birds in their natural habitat so please leave them at home on your next visit to Don Edwards.

Everybody's Free ... To Wear Sunscreen

The 90's taught us all one important thing - wear sunscreen (thank you Baz Luhrmann).  With so many options on the market, how do we know what is best for us and our kids?  Here are some tips.


Avoid Aerosol/Spray Sunscreens

In 2013, the FDA officially warned that some aerosol sunscreens are flammable and can cause serious injury.  They are also very ineffective - we tend to miss large areas of skin when we use spray-on sunscreens.

As an aquatics director, I have really come to despise aerosol sunscreens over the years.  Parents tend to think that "spray on" means that you don't have to rub it in at all (which is how large sections get missed).  They spray their kids, don't rub it in, and let their kids jump in the pool.  Without time to absorb into the skin, the chemicals bond with hypoclorous acid (used to disinfect pools) and form a smelly gas that hovers just above the surface of the water.  This gas bonds to the skin of all swimmers and causes eye, skin, and lung irritation for anyone breathing it.

So the next time you leave a pool with scratchy eyes and smelling like "pool", blame spray-on sunscreen!


Chemical vs. Physical Sunscreen

There are two main types of sunscreen.

  • Chemical Sunscreens (oxybenzone, avobenzone, octinoxate, etc.) absorb the sun's rays.  They offer more coverage against UVA and UVB rays, but can sometimes cause skin irritation.  It is important to wait 20 minutes after applying the sunscreen before sun exposure for maximum protection.

  • Physical Sunscreens (titanium dioxide, zinc oxide) work by deflecting the sun's rays from your skin.  It is effective immediately after application, but it is generally thick and harder to rub in.  It also needs to be reapplied more frequently.


Understanding SPF

SPF, or sun protection factor, indicates a sunscreen's effectiveness at preventing sunburn.  Although widely misunderstood, it's actually a simple formula.  You take your natural skin protection (low for individuals with light skin, higher for individuals with darker skin) and multiply it by the sunscreen's SPF and you get your total period of protection before you need to reapply.

Lil' H inherited my fair skin, so let's say her natural skin protection is 10 minutes.  If I use SPF 15 sunscreen on her, her period of protection is 150 minutes (this would be shortened if she was swimming).

It's not necessary to spend extra money on sunscreens with an SPF higher than 30.  SPF 30 is rated to block 97% of UVA/UVB rays, while 50+ (the FDA maximum) is only rated to block 98%.  Additionally, new research shows that too much SPF interferes with the body's ability to convert Vitamin D into calcium for bone growth and development.


Protecting Itty Bitty Baby Skin

For kiddos under six months old, it is best to skip the chemicals in sunscreens.  Use blankets, long-sleeves, hats, etc. to minimize sun exposure.

For kids over six months, it is still a good idea to limit sun exposure but if you do use sunscreen, stick to physical sunscreens instead of chemical.  The main ingredient (usually zinc oxide) is the same as diaper cream, so you know it's safe!

A lot of parents like the Badger Baby Sunscreen, but personally, I find it VERY difficult to rub in and it has a funny smell.


I prefer the Babyganics Mineral-Based Baby Sunsceren.  It has a light, fresh, smell and it is easy to apply.

Saturday, March 7, 2015

Gear Review: SylvanSport GO - Coolest. Camper. Ever.


The GO Trailer at Uvas Canyon County Park
I never thought we'd own a recreational vehicle.  We always judged people at campgrounds with their RV's, and their electrical hookups, and their satellite dishes... we called it "Kamping" (and don't even get me started on this new trend of glamping... sheesh!).  But with a kid in the picture, we were looking for an option that made a quick weekend camping trip doable.  We also needed something that could hold all our gear for our triathlons.  We also needed something that we could tow for road trips.  The "Must Have" list was getting long, would we ever find the perfect thing?

After some searching, we found something that fit the bill and now we are proud owners of the coolest toy.  No, really! National Geographic Adventure called it the "Coolest. Camper. Ever." And I can attest, it's true!

The GO Trailer in towing mode

The GO trailer by SylvanSport is a very unique product.  It's an ultra-light, extremely versatile trailer designed by outdoorsy people for outdoorsy people.  It can be used to haul bikes, ATVs, boats, gear, refrigerators, IKEA flat-packs... you get the idea!  But see that cool grey box on top?  That becomes a house on wheels for camping.  It has multiple interior configurations, and depending on how you set up, it can sleep 1-5 adults easily.

Mr. H opening up the tent cabin on the GO trailer
Our first trip with the GO was a total success.  On our first attempt, we were able to set up the tent cabin in less than 15 minutes.  It was great to have so much space to move around in the tent.  Lil' H loved it so much that she BAWLED when we took it down at the end of our camping trip.  All of us are looking forward to taking to GO on more adventures soon!

 If you have any questions about the GO, or want to see it in person, please let us know!

(Disclaimer: I am a GoGetter for Sylvan Sport, a group of happy owners who share their love for their GO trailers and advertise for the company.  However, I was not paid for this review and my opinions are my own.)

Saturday, February 28, 2015

Furry Children: Hiking With Dogs In California

In November 2013, we were driving back from a vacation in San Simeon (more on nature experiences there in a future post!), and we decided to take the long route home.  We love the curvy roads of Highway 1 as they hug the rugged coastline of California.

Four hours was too long in the car for us, Lil' H, and our furry child - Toby, so we decided we'd stop at one of the famed California State Parks in Bug Sur along the way to stretch our legs and take a hike.

Our first stop was Limekiln State Park.  Limekiln has a well-deserved reputation for breath-taking views of the Big Sur coast, towering Redwoods, and the four enormous kilns that give the park its name.  We pulled in, paid for a day pass, then noticed the sign that every dog owner dreads:


The woman at the gate kindly gave us our money back and we continued up the road to Pfeiffer Big Sur State Park.  This time we asked at the gate before paying - are dogs allowed on trails?  The answer was, sadly, no.  Moving north along Highway 1, we got the same answer at Andrew Molera State Park as well.  

A helpful ranger explained to us that at Andrew Molera, like most California State Parks, dogs are allowed in campgrounds and on roads, but not on trails.  He was kind enough to point out that we could back track just a few miles down the road to the Pine Ridge Trailhead at Big Sur Station to access the Ventana Wilderness trail network.  The Ventana Wildnerness is managed by the United States Forest Service so their policies are different.  Dogs had to be on leash but were allowed on trails.  

Hiking in the Ventana Wilderness, dogs welcome!
We were glad to finally have an option to stretch our legs, and we learned some important information.  California State Parks has more information about visiting parks with your dog on their website.  It's always a good idea to call whatever campground, park, or even hotel, your are visiting with your dog to be clear on their policies.  

US Forest Service wilderness areas, forests, and campgrounds usually have more flexible dog policies, so aim for those properties when traveling with your dog.  Also, local governments have their own policies, so do your research before planning a trip to county parks, city parks, national wildlife refuges, open spaces, and national parks as they all have their own rules and policies.

Also, please remember that it is NEVER a good idea to leave a dog locked in a car when you want to go somewhere that dogs are not allowed.  The American Veterinary Medical Association has a helpful chart to help you see how warm it can really get inside your car, even in just a few minutes.  

What are your favorite trails and campgrounds that are dog friendly?

Campground Review: Big Basin Redwoods State Park

Big Basin Redwoods, located in the Santa Cruz mountains, is California's oldest state park.  One quick look around and you can see why lawmakers were quick to designate and protect this area in 1902.  The park is filled with beautiful redwoods, a plethora of wildlife, and over 80 miles of trails.


Hiking on the Redwood Loop Trail
While Big Basin is definitely worth a visit, it's not among our favorites.  The park is so large and spread out that you actually have to get in to your car to drive to the Visitor Center, General Store, or Nature Museum, or to the other trailheads and campgrounds.  You could walk or ride bikes, but the highway runs through the center of the park so there is a lot of traffic in the busy summer months.

The Redwood Loop Trail, which starts just across from the Visitor Center, is beautiful and the landmarks are well labeled.  The trail is smooth and wide and although it's only a half-mile, you'll want to budget at least 45 minutes to take pictures and let your little ones take it all in.  Dogs aren't allowed on the Redwood Loop Trail, or any other trails in the park, but they are allowed on the North Escape Road which is a combination hard-packed dirt and asphalt access road heading north through some of the picnic sites along Opal Creek.

Toby and Lil' H can't wait to get up and go hiking, unfortunately dogs aren't allowed on trails in most California State Parks
We visited the park in July 2014, when Lil' H was 20 months old.  The park was busy and crowded, even though we were there during the week (we couldn't get weekend reservations, everything was reserved).  We stayed in the Blooms Creek Campground, and we had enough room in our campsite to set up one large tent and a small pop-up trailer.  (Note: If you are driving to Big Basin Redwoods SP with a trailer, following Driving Route #1 through Boulder Creek, it's the least windy)

Lil' H enjoys her first S'more at Blooms Creek Campground

The Blooms Creek, Huckleberry, and Sempervirens Campgrounds all have potable water, restrooms, and showers (pay-showers only).  The Wastahi and Jay Campgrounds are for through-hikers (backpackers) only.  Fires are only allowed in the metal rings at the campsites, and you can purchase firewood from the general store if you don't bring your own.  Camping is available year-round, but not at all of the campgrounds.  Reservations are available online, and be sure to make reservations well in advance if you plan to camp at Big Basin Redwoods on a summer weekend!

Overall Impression:
This campground is best for families who have flexibility to camp mid-week but who don't want to travel far from home and want access to a lot of amenities.

Pros:
Short distance from Bay Area
Variety of camping options, including primitive campsites, group sites, and tent cabins
General Store and Gift Shop on site
Nature Museum and Ranger-led hikes and activities
Redwoods, everyone loves redwoods!

Cons: 
Windy roads to the park aren't recommended for camper trailers or carsick kids
Rustic/dated bathrooms and pay-showers only ($0.25 for 2 minutes)
Weekend reservations are difficult in the busy summer months, try for weekdays for more availability.
No hook-ups for RVs
Dogs not allowed on trails (true for most California State Parks)

If you have any other questions about this campground, or any others, let us know!

Wednesday, February 18, 2015

Camping 101: Where Do I Start?

If you've never been camping before, or you haven't been since your days as a happy camper at 'Camp Wannahockaloogie', it can be intimidating to put together a camping trip.  Here are some tips for pulling of a successful camping trip for your family!

1. Go with friends!  Specifically, go with friends who have been camping and can help you.  There are a lot of advantages to going camping with friends.  You can split up meal planning responsibilities.  You can bond around the campfire together.  And best off all, you can share gear!


2. Try before you buy!  If you've never been camping, and you're not sure you're going to like it, don't invest in a lot of expensive gear.  Instead, borrow gear from friends or rent it from local gear shops.  If you end up loving camping, you'll already have a good idea of what type of gear you like and don't like.  When you are ready to invest, check out geartrade.com for great deals on outdoor clothing and equipment.


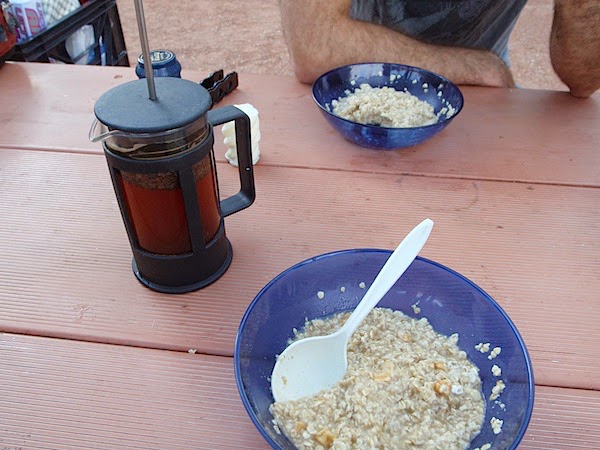
3. Keep it simple!  Maybe a nine-day backpacking trip over the Sierra Nevada's isn't the best place to start (although that was Mrs. H's first outdoorsy experience, and she was hooked!).  Instead, start with a one- or two-night camping trip at a campground that's close to home (in case you need to bail).  Go during warm weather so you don't need any special gear.  Keep meal time easy by bringing pre-packaged food like mac n' cheese, granola bars, and instant oatmeal.


4. What do I really need?  Surprisingly, not much.  Sure, there are families like us who devote half of their living space to gear storage, but you don't have to be a zealot about it!

  • Somewhere to sleep: An RV, a trailer, a pop-up camper, a tent, or a hammock between two trees all work great
  • Something to sleep on: Your rv/camper might have beds, or yu could use a blow-up mattress, a Thermarest, or even an inflatable pool raft
  • Something to sleep in: If you are sleeping on a mattress, just bring sheets and blankets from home.  If you are going for the full camping experience, use a sleeping bag.
  • Something to eat: Don't worry about a gourmet dining experience.  Just stick to pre-packaged foods in the beginning, you can graduate to gourmet dutch oven dinners over a campfire when you get more experience under your belt!  You might need to bring water for drinking and cooking, check your campground ahead of time to see if there is water available.  Don't forget graham crackers, Hershey bars, and marshmallows - what is camping without s'mores?
  • Some safety essentials:  Even if the weather is gorgeous during the day, it's sure to turn colder at night so always pack a warm layer for every member of your group.  Also, make sure to bring a flashlight, headlamp, or lantern as well as a simple first aid kit.
We'll get into more specifics in future posts about campfire cooking, gear tips, and packing lists.  If you have specific questions, let us know!

Campground Review: Uvas Canyon County Park

This winter has been warm and dry so far.  Not great for our drought conditions, but great for winter camping!  When we lived on the east coast, I never wanted to go outside in winter, let alone camp.  I remember one snowy camping trip in West Virginia in October. I was pretty mad at Mr. H for that one.  But winter camping in the Bay Area of California is considerably more comfortable, even with kids!  We decided to take advantage of the nice weather and spend a night in the great outdoors.  We wanted to keep it easy - something near by.  SV Toddler was raving about Uvas Canyon County Park on her blog recently, so we were excited to see that there was a campground there as well.

Hiking the Waterfall Loop Trail

Uvas Canyon is definitely a hidden-gem.  Tucked a few miles off main roads in a canyon south of San Jose, the park features hiking trails, campsites, and beautiful waterfalls.

While we were there we did the Waterfall Loop Trail, an easy 1-mile trek with beautiful scenery.  We also completed the Knibb's Knob trail, even though the map warned us that the trail was "STEEP".  They were not kidding!  The trail goes strait up and down on a dusty, exposed fire-road.  I wouldn't recommend it for families. It was a pain hiking downhill with Lil' H in the pack, very hard on the knees!

Don't let the picture fool you, the Knibb's Knob trail was VERY steep!

The campground itself is rustic - there are no hookups for RVs.  However the sites are spacious and the bathrooms and showers are the cleanest I have ever seen at a campground.  If you do have a trailer or pop-up camper, aim for sites 19-22.  The rest of the sites are best for tents only.  All of the sites have a fire-ring and firewood is available for $7.60 per box from the rangers.  EDITED to add: There are several water spigots with potable water throughout the campsite, so you don't need to worry about bringing your own water.

Lil' H's favorite part of this campground was the rock retaining wall near our campsite.  She threw on her rain boots (which she called rock-climbing shoes) and climbed up the wall over and over and over.  The paths nearby were nice and smooth so definitely bring a bicycle to keep your kids entertained in camp!


Overall, I'd say this is an ideal campground for first-time campers in the Bay Area.  It's close enough to home that if anything goes wrong, you can be home in a few minutes.  But with so many great trails and things to do, who would want to go home?

Pros: Uvas Canyon is only a 45-minute drive from Silicon Valley.  The campsites and amenities (clean bathrooms and showers, fire ring in every camp site) are a great value for the price - only $12 per night!  Availability depends on the season - book a site in winter, spring, or fall to avoid the summer rush.  This place is beautiful year round.

Cons: It is a rustic campground with no hookups available.  Because the park is in a canyon, daylight hours are truncated, however this would be a Pro in the warm summer months.  The campground would stay shady most of the day.

Have specific questions about Uvas Canyon?  Let us know!